Quick answer: Replacing a dell precision 5530 battery is straightforward if you work slowly and avoid metal prying on the cells. You’ll remove the bottom cover (Torx T5), unplug the battery cable, swap the pack (56Wh RRCGW or 97Wh 6GTPY), reassemble, then calibrate once. Read the HDD-bay note if you’re moving between 56Wh and 97Wh.

Before you start
- Back up data and shut down Windows completely. Unplug AC and peripherals.
- Tools: Torx T5 screwdriver (bottom cover), Phillips #0 (battery screws), plastic spudger, ESD wrist strap (recommended), small tray for screws.
- Optional BIOS safety: On some Dells you can Disable Battery in BIOS while servicing. If available, enable it before opening the laptop; remember to re-enable after reassembly.
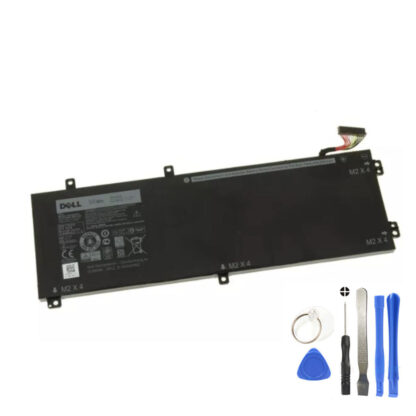
- 56Wh vs 97Wh reminder: 97Wh (6GTPY) uses the 2.5″ SATA bay area. If you have a 2.5″ HDD/SSD installed, stay with 56Wh (RRCGW) or migrate storage to M.2 NVMe first.
Step-by-step replacement
- Power drain: With AC unplugged, hold the power button for 15 seconds to discharge residual energy.
- Remove bottom cover: Turn the laptop upside down on a soft cloth. Remove all T5 screws around the perimeter (keep track of any different lengths). Gently lift the cover from the hinge side; use a plastic pick if needed.
- Disconnect the battery cable first: Locate the battery connector on the board. Use a plastic tool to ease the plug straight out. Never pull on wires.
- Unscrew the battery: Remove the Phillips screws securing the pack. Note the screw map; some screws may be different lengths.
- Lift out the old pack: Hold the battery by its rigid edges; do not flex or press on the cells.
- Fit the new pack: Place the RRCGW (56Wh) or 6GTPY (97Wh) into position, ensuring cable routing matches the original. Reinstall screws snugly (do not overtighten).
- Reconnect the battery cable: Align and press the plug in until fully seated.
- Reassemble the bottom cover: Check that no cables are pinched; reinstall all T5 screws. If you used BIOS “Disable Battery,” re-enable it at next boot.
- First power-on: Connect AC and boot into BIOS (F2) to verify battery is detected and shows a sensible charge %.
Calibrate and verify
- One-time calibration: Charge to 100% without interruption, then use on battery to about 10–20%, and charge back to 100%. This syncs the fuel gauge.
- Windows battery report: Run
powercfg /batteryreportand check that Full charge capacity is close to design capacity for your pack. - Update firmware: Install the latest BIOS and power/thermal drivers to ensure correct charge and fan behavior.
Troubleshooting after replacement
- Won’t power on: Reseat the battery connector; try a 15-second power button hold; verify the AC adapter LED is on.
- “Plugged in, not charging”: Check that BIOS shows the correct AC Adapter Type (should be 130 W). If “Unknown,” inspect the adapter tip and DC jack.
- Rattling or gaps: Confirm all battery screws are installed and the cover clips are fully seated.
- Low runtime: Ensure the dGPU isn’t forced on; check battery health and Windows/BIOS power modes.
Going from 56Wh → 97Wh (or back)
- 56Wh → 97Wh upgrade: Remove the 2.5″ bay bracket/cable (if present). Your system must run M.2 NVMe only. Cloning from a 2.5″ drive to M.2 before the swap avoids downtime.
- 97Wh → 56Wh change: If you want to add a 2.5″ drive, you’ll need the bay bracket and SATA cable kit compatible with the 5530.
Safety & disposal
- Never puncture, bend, or heat the pack. Use only plastic tools near cells.
- If a pack is swollen, do not press it flat. Replace immediately and follow local e-waste rules.
- Recycle the old battery at an authorised collection point — do not bin it.
Choose the right battery for your build
- 56Wh RRCGW — keeps the 2.5″ bay for HDD/SSD; lighter and lower cost.
- 97Wh 6GTPY — maximum runtime; uses the 2.5″ bay area (M.2-only).
Bottom line: With the right tools and careful steps, you can safely replace a dell precision 5530 battery at home. Verify storage layout, swap the pack, then calibrate once — and enjoy reliable unplugged time again.